Running Oracle Data Miner on the Mac
I have a Mac, and, as all Mac users, I want to do everything from my Mac (it does not hurt that it has a great looking and easy to use OS). When I found out that I could run Oracle Data Miner from my Mac I had to try it. Small caveat, there are no instructions on how to install Oracle Data Miner on the Mac. But there are instructions for Linux (the Mac OS is Unix-based). So, I followed those instructions and it worked like a charm. But that required that I used the shell to run Oracle Data Miner. However, as most Mac users would, I wanted to run the program from the graphical user interface. Below I show how to install Oracle Data Miner on the Mac, run it from the shell, and how to create a script to launch it from the graphical interface of the OS.
Installing Oracle Data Miner on the Mac
The program requires Java JDK 1.4.2. If your Mac OS X is up to date (I am running OS X 10.4.5) you are all set. To check the version of Java, open a terminal session (using the Terminal application) and use the command:
java -versionFollow the instructions for installation on Unix or Linux:
- Download odminer.zip from here.
- Unzip odminer.zip by double clicking on odminer.zip. This creates the folder odminer (in the current working folder) and inflates the archive into it. For the Oracle Data Miner beta version, it creates the odminer_102_beta2 Folder.
- Move the created folder to the desired location. In my case, I moved this folder to the Applications folder (see Figure 1).

Figure 1: Installing Oracle Data Miner in the Applications folder.
Running from the ShellTo start Oracle Data Miner, open a Terminal shell and run the script odminer in the directory MINER_HOME/bin (see Figure 2), where MINER_HOME is the directory where Oracle Data Miner is installed. In this example, MINER_HOME is /Applications/odminer_102_beta2 Folder. I also used "&" after the command to run odminer in the background. If the script is not executable (which was my case), reset the permissions:
chmod +x odminer
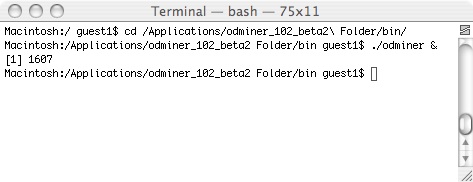
Figure 2: Invoking odminer from a Terminal shell.
The first time that you start Oracle Data Miner, a dialog (Figure 3) appears asking for the following information (you may need to contact your Oracle Data Mining DBA for this information):- Connection Name, the name of the connection
- User, the name of the ODM user schema where data mining will take place
- Password, the ODM user password
- Host, the system where ODM is installed
- Port, the port number for the connection
- Sid, the SID for the database where ODM is installed
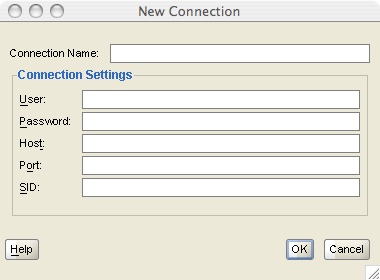
Figure 3: New connection dialog.
Click OK when you finish the definition. You are returned to the Choose Connection dialog (Figure 4). You can now select the connection that you just defined from the dropdown box.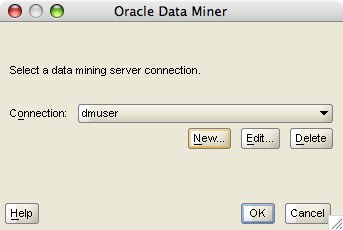
Figure 4: Choose connection dialog.
Click OK to bring up the Oracle Data Miner main screen (Figure 5).
Figure 5: Oracle Data Miner on Mac OS X.
Running from the Graphical InterfaceRunning from the Terminal shell works fine, but, as most Mac users, I want to run my applications from the Mac OS graphical interface. This can be easily done using a shell script. In Mac OS 10.4 we can use Automator (Figure 6) to do create one.

Figure 6: Invoking Automator.
Start Automator and then select Run Shell Script from the Action list and drag it to the left pane (Figure 7).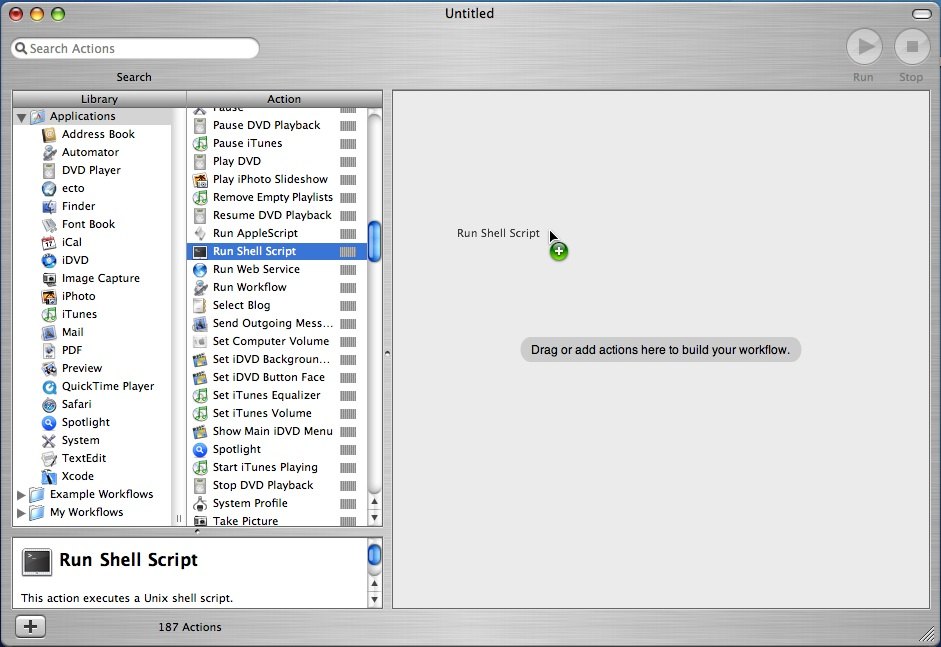
Figure 7: Creating a Run Shell Script action.
Next enter the following lines in the Run Shell Script text box (Figure 8):cd MINER_HOME/binwhere, in my case, MINER_HOME is /Applications/odminer_102_beta2 Folder. Note how the folder name is spelled in Figure 7. To get the correct name it is probably a good idea to go to a Terminal shell, change directory to the MINER_HOME folder, and type pwd to get the name of the folder at the shell.
./odminer
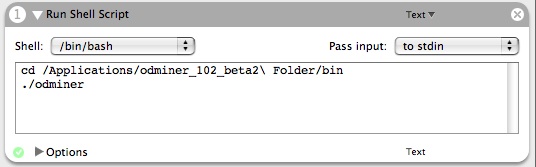
Figure 8: Entering the shell script actions.
Save the script using the File - Save As... menu option (Figure 9)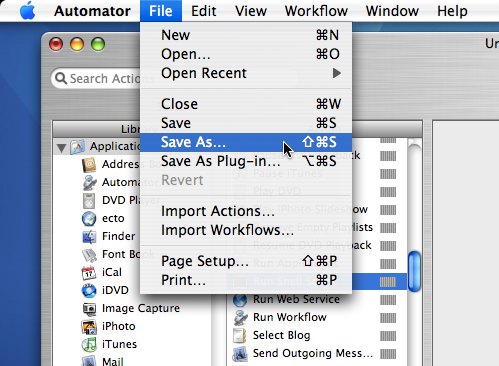
Figure 9: Saving the script.
Select a name for the application and Application for File Format (Figure 10) and you are done. Just double click on the icon for the new application and you will launch Oracle Data Miner!
Figure 10: Saving the script as an application.
UPDATE: The RTM version does not work with the Mac. There will be a patch fixing it. I'll post a note when it is out. For now keep using the beta release.


